
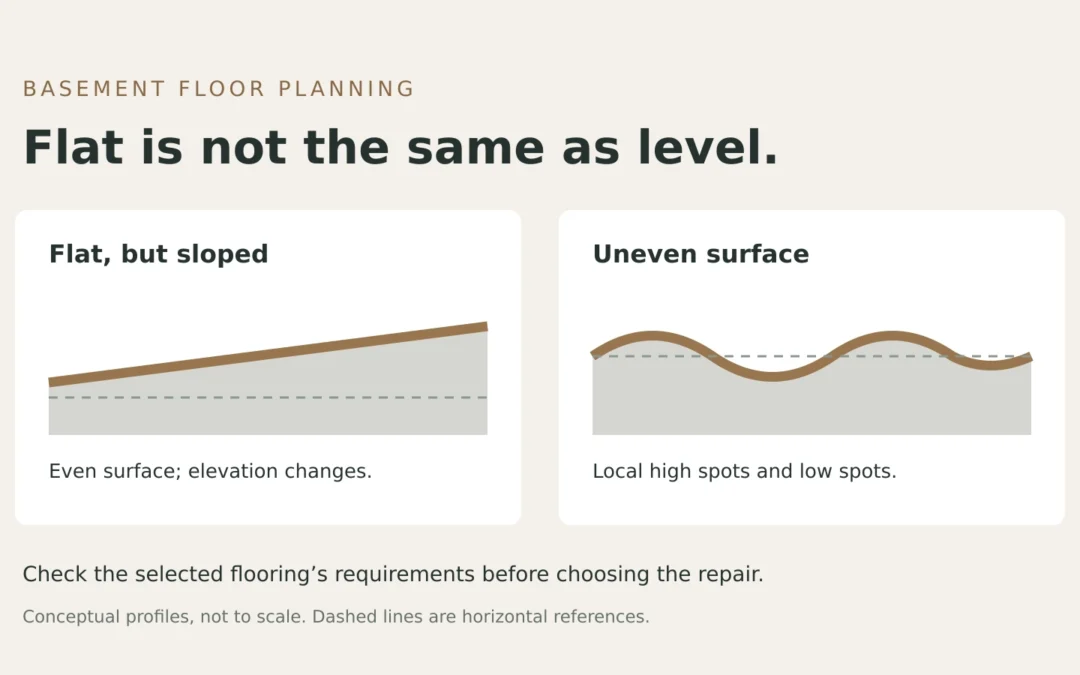
Before installing vinyl plank in a basement, check the concrete for flatness, moisture and soundness, then price the preparation against the exact flooring instructions. A rigid plank is not a substitute for a suitable base. Nor does every sloping basement floor need to be made perfectly horizontal.
For a Niagara basement renovation, this assessment belongs near the start of planning, not on the morning the new flooring arrives. It helps separate a small patching allowance from a much larger floor-preparation scope.
Flat and level describe different things
A flat surface has no significant local humps or dips. A level surface is horizontal. A concrete floor can be consistently sloped yet relatively flat; another can be broadly level while still having depressions and ridges.
That distinction changes the question you ask your installer. Instead of “Will you level the floor?”, ask: “What needs correcting to meet this flooring’s requirements, and will the finished surface still slope?” A bubble level alone does not provide a complete assessment of surface variation.
Start with the selected plank, not a universal tolerance
Different products have different requirements. For example, Mannington’s March 2026 ADURA Rigid guide specifies flatness within 3/16 inch over 10 feet and 1/32 inch over 12 inches. Those are requirements for that product, not a general rule for all vinyl flooring. Its instructions also call for a dry, sound, clean concrete base and moisture testing.
Ask the installer to assess the room using the measurement method and tolerances in your selected product’s current instructions. Record the problem areas before agreeing on repairs. A single check across the centre of the room can miss a ridge at a doorway or a dip along a wall. See Mannington’s installation information for the current product documents.
If you are still choosing the finish, our basement vinyl plank versus tile guide covers the broader material decision. Neither choice makes substrate assessment unnecessary.
Does the floor need patching or a broader underlayment?
The repair should follow the condition of the slab, not simply the room’s square footage.
- Isolated low spots: a compatible patching product may address local areas without raising the entire floor.
- Widespread irregularity: a suitable self-levelling underlayment may be considered, with its thickness, preparation and drying requirements included in the plan.
- High spots: an installer must assess whether and how they can be reduced safely. Adding material everywhere else is not automatically the best answer.
- Movement or water problems: investigate the cause before covering the slab. A smoother surface does not resolve an active underlying problem.
“Self-levelling” does not mean a product can be poured onto any existing surface. As one example, ARDEX V 1300 has substrate preparation and priming requirements, is not a vapour barrier, and requires movement joints and active cracks to be addressed according to its instructions. Review the manufacturer’s product information and technical data for the chosen system.
Old flooring and adhesive also need assessment before removal or mechanical preparation. Do not start grinding or sanding an unidentified old material. Our guide to asbestos checks before demolition explains why that investigation comes first.
Moisture and drying are separate checks
A floor can look smooth and feel dry without being ready for the selected covering. The flooring, preparation products and any adhesive must be compatible with the tested conditions. A product described as waterproof does not, by itself, answer questions about moisture coming through the slab.
Likewise, “walkable” and “ready for flooring” are different milestones. Confirm the applicable waiting period for the actual underlayment thickness, site conditions and finish. Do not build the programme around the shortest time printed on a product page.
Check the edges before raising the floor
Preparation changes finished height. Before approving a broad pour or another layer, review the bottom stair, door clearances, adjacent rooms, floor drains and access panels. Include the finish and any permitted underlay in the total assembly, not just the levelling material.
The bottom stair deserves particular attention: changing only the basement floor can change its relationship to the other risers. Our guide to basement stairs and finished-floor heights explains what to coordinate before installation.
What a clear preparation allowance should identify
- The selected flooring and applicable installation instructions.
- Which areas were checked, and which need correction.
- Removal, surface preparation, repairs, primer and underlayment included in the scope.
- Moisture assessment and responsibility for any additional investigation.
- Expected finished heights at stairs and transitions.
- Drying requirements and the process for approving work beyond the allowance.
These details make competing quotes easier to compare. A lower installation price may simply leave more preparation undefined.
Common questions
Can extra underlay hide an uneven slab?
Do not assume so. Use only the underlay permitted by the selected flooring manufacturer. Extra cushioning is not a substitute for correcting an unsuitable substrate.
Does the whole basement have to be perfectly level?
Not necessarily. Establish the flooring’s flatness requirements and assess the room’s function, drainage and transitions separately. Agree on the intended result before the repair method is chosen.
When should the slab be checked?
As early as it is accessible, with a further assessment after existing finishes are removed if they concealed the concrete. Keep unresolved preparation out of the “assumed included” category.
Planning a basement renovation in Niagara? Contact Homes By Adam to discuss the flooring, preparation and adjoining details as one coordinated scope.
