
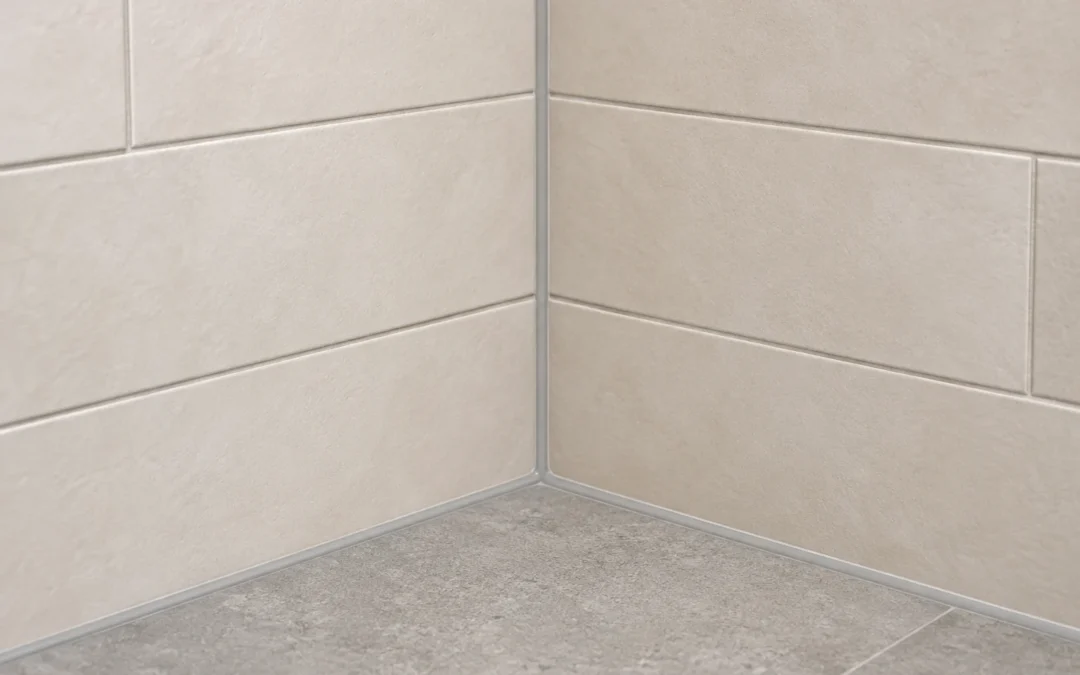
Bathroom tile needs room to accommodate movement at corners, around the perimeter and where it meets fixtures or other materials. These connections are generally detailed with a suitable flexible sealant or a purpose-designed movement profile rather than rigid grout. Their location, width and construction should be planned before tiling, using the requirements for the actual installation.
For a bathroom renovation in Niagara, ask to see that plan alongside the tile layout. A colour-matched joint can look discreet while doing a different job from the grout between tiles.
Why some tile joints need to stay flexible
Tile, setting materials and the surface beneath them do not all respond to temperature, moisture and loading in the same way. Walls and floors can also move differently. A movement joint gives that movement somewhere to occur without forcing the tiled surfaces tightly against one another.
LATICRETE’s movement-joint guidance explains how inadequate movement accommodation can contribute to cracked grout and, in severe cases, tile lifting from its base. Replacing cracked corner grout with more grout may leave the original cause unresolved.
Room size alone does not settle the question. The Terrazzo, Tile and Marble Association of Canada describes movement joints as a necessary part of tile installation. Even a compact bathroom has corners and boundaries to address.
Identify the connections before tile is installed
Inside corners and wall-to-floor junctions
A change of plane is where the tiled surface turns a corner, such as one shower wall meeting another or a wall meeting the floor. These are important locations for movement accommodation. Ask which joints will receive sealant and which, if any, will use a compatible movement profile.
Review the visible finish at the same time. The sealant colour, sheen and finished joint can differ from the grout, even when the products share a colour name. A sample helps establish expectations before the whole shower is finished.
Perimeters and fixed objects
The tile floor needs an appropriate relationship with the walls and other restraining surfaces around it. A perimeter gap packed with mortar or grout cannot perform as an open movement space.
Schluter’s DITRA installation handbook addresses perimeter joints and keeping restraining materials out of them. Where trim hides a joint, ask how that space will be protected during setting, grouting and finishing. A hidden joint still needs to work.
Tubs, shower bases and neighbouring finishes
Tile meeting a tub, prefabricated shower base or another flooring material is another connection to resolve. Follow both the fixture’s installation instructions and the tile-system detail. Do not assume that the bead visible at the surface explains how the connection behind it is built.
At the doorway, review the finished heights and the movement provision together. A decorative transition strip or tile edge trim should not automatically be treated as a movement joint. Confirm what the selected product actually does.
Joints within the tiled area
A larger floor, continuous tile extending into other rooms, direct sunlight or floor warming can affect the movement-joint layout. The Tile Council of North America’s spacing guidance identifies temperature, moisture and substrate conditions among the factors to consider.
Ask the installer to identify any existing substrate joints and explain how the chosen assembly treats them. Different joint types require different details. Do not simply cover a building expansion joint with tile or assume an uncoupling membrane removes the need for movement joints. If floor warming is part of the project, settle it during the broader heated bathroom floor planning.
Choose the complete joint detail, not just a tube colour
“Bathroom caulk” is too broad a specification. The selected sealant needs to suit the adjoining materials, exposure, expected movement and location. A product suitable for a shower-wall corner may not be appropriate for an exposed floor joint subject to wear. TCNA’s movement-joint materials guidance distinguishes traffic conditions when discussing sealant selection.
Joint width, sealant depth, backing material and preparation must follow the applicable design and current product instructions. Where specified, backer rod or bond-breaker tape controls the sealant detail and prevents it from bonding to the bottom as well as both sides. The International Masonry Institute’s perimeter-joint detail illustrates this separation. Three-sided adhesion can restrict the movement the joint is meant to accommodate.
For example, the LATASIL product data sheet sets its own joint limits, preparation, primer and curing requirements. It also calls for testing with stone. Those requirements cannot be replaced by a universal joint size or the assumption that every silicone behaves alike.
A purpose-designed profile can be another option. Schluter’s movement-profile range includes different products for corners, perimeters and other locations. Choose the appropriate profile and installation detail while planning the tile work.
Keep movement accommodation separate from waterproofing
A flexible surface joint does not replace the shower’s waterproofing assembly. The waterproofing still needs the specified continuity at corners, seams, fixture connections and penetrations beneath the finish.
For instance, Schluter’s KERDI instructions describe membrane connections and corner details as part of waterproofing before tile is installed. Other systems have their own methods. A neat silicone bead cannot establish that hidden waterproofing is present or repair every problem behind the tile.
Ask two separate questions: how will this connection accommodate movement, and how will the wet-area assembly remain watertight? Both answers should refer to the chosen products and construction.
Investigate recurring cracks before making a cosmetic repair
A cracked corner joint is a reason to inspect, not enough information to diagnose the whole shower. Photograph the area and note whether the crack returns, whether tiles or fixtures feel loose, and whether there is staining or dampness nearby. Repeated failure deserves more investigation than another surface bead.
Have the assembly assessed before removing material if the waterproofing location or condition is uncertain. Cutting deeply into a tiled corner can damage layers behind it. If water is escaping the shower or affecting adjoining finishes, stop using it until the cause has been assessed.
For a suitable sealant replacement, follow the manufacturer’s requirements for removal, clean bonding surfaces, preparation and curing. Applying new sealant over loose grout or failing old sealant is not the same as constructing the required joint. Confirm when the shower can return to use rather than judging readiness by whether the surface feels dry.
Put the joint plan in the renovation scope
Before approving tile installation, confirm:
- Which corners, perimeters, fixture connections and floor areas need movement accommodation.
- Which sealant or profile is specified for each location.
- Who sets the joint dimensions and checks product compatibility.
- How movement details connect with the separate waterproofing details.
- What cleaning, inspection and eventual renewal the finished joints require.
Keep the product names and care instructions with the renovation records. If you are planning a bathroom in Niagara Falls, St. Catharines or elsewhere in Niagara, contact Homes By Adam to discuss the room, tile layout and details that need to be resolved before work begins.
